Showing posts with label tutorials. Show all posts

Wednesday, May 23, 2012

Very Easy and Cool Nail Art Sponging Technique

Very Easy and Cool Nail Art Sponging Technique
Would like to try something really easy and fun?  Try Sponging Technique...
Here I bring you a very great tutorial.  Hope you find it useful.


Here are some great ideas of Nail Art using Sponge Technique.
Try them and have fun!!


Monday, May 21, 2012

Basket Weave Hairstyle Design

Basket Weave Hairstyle Design
You will not be able to do this on yourself.  It is kind of complicated but it is a really cute hairstyle to try. Would you be doing this on your daughter or a friend soon?

Here is a really great tutorial for you to learn how to do this great and fun Basket Weave Hairstyle.
Try it!!


Tutorial From:  http://www.princesshairstyles.com/

Sunday, May 20, 2012

How to Ombre Glitter, Nail Art Ideas

How to Ombre Glitter, Nail Art Ideas
I saw this tutorial yesterday and it's the easiest way to get cute ombre glitter nails in just a few minutes.  You have to try it!

What you need:
A base shade, two complementary glitters, one slightly darker than the other one.  You will also need a clear top coat and a eyeliner brush with synthetic bristles.

  • First, apply two coats of the base shade, letting the first one dry before applying the second coat. 
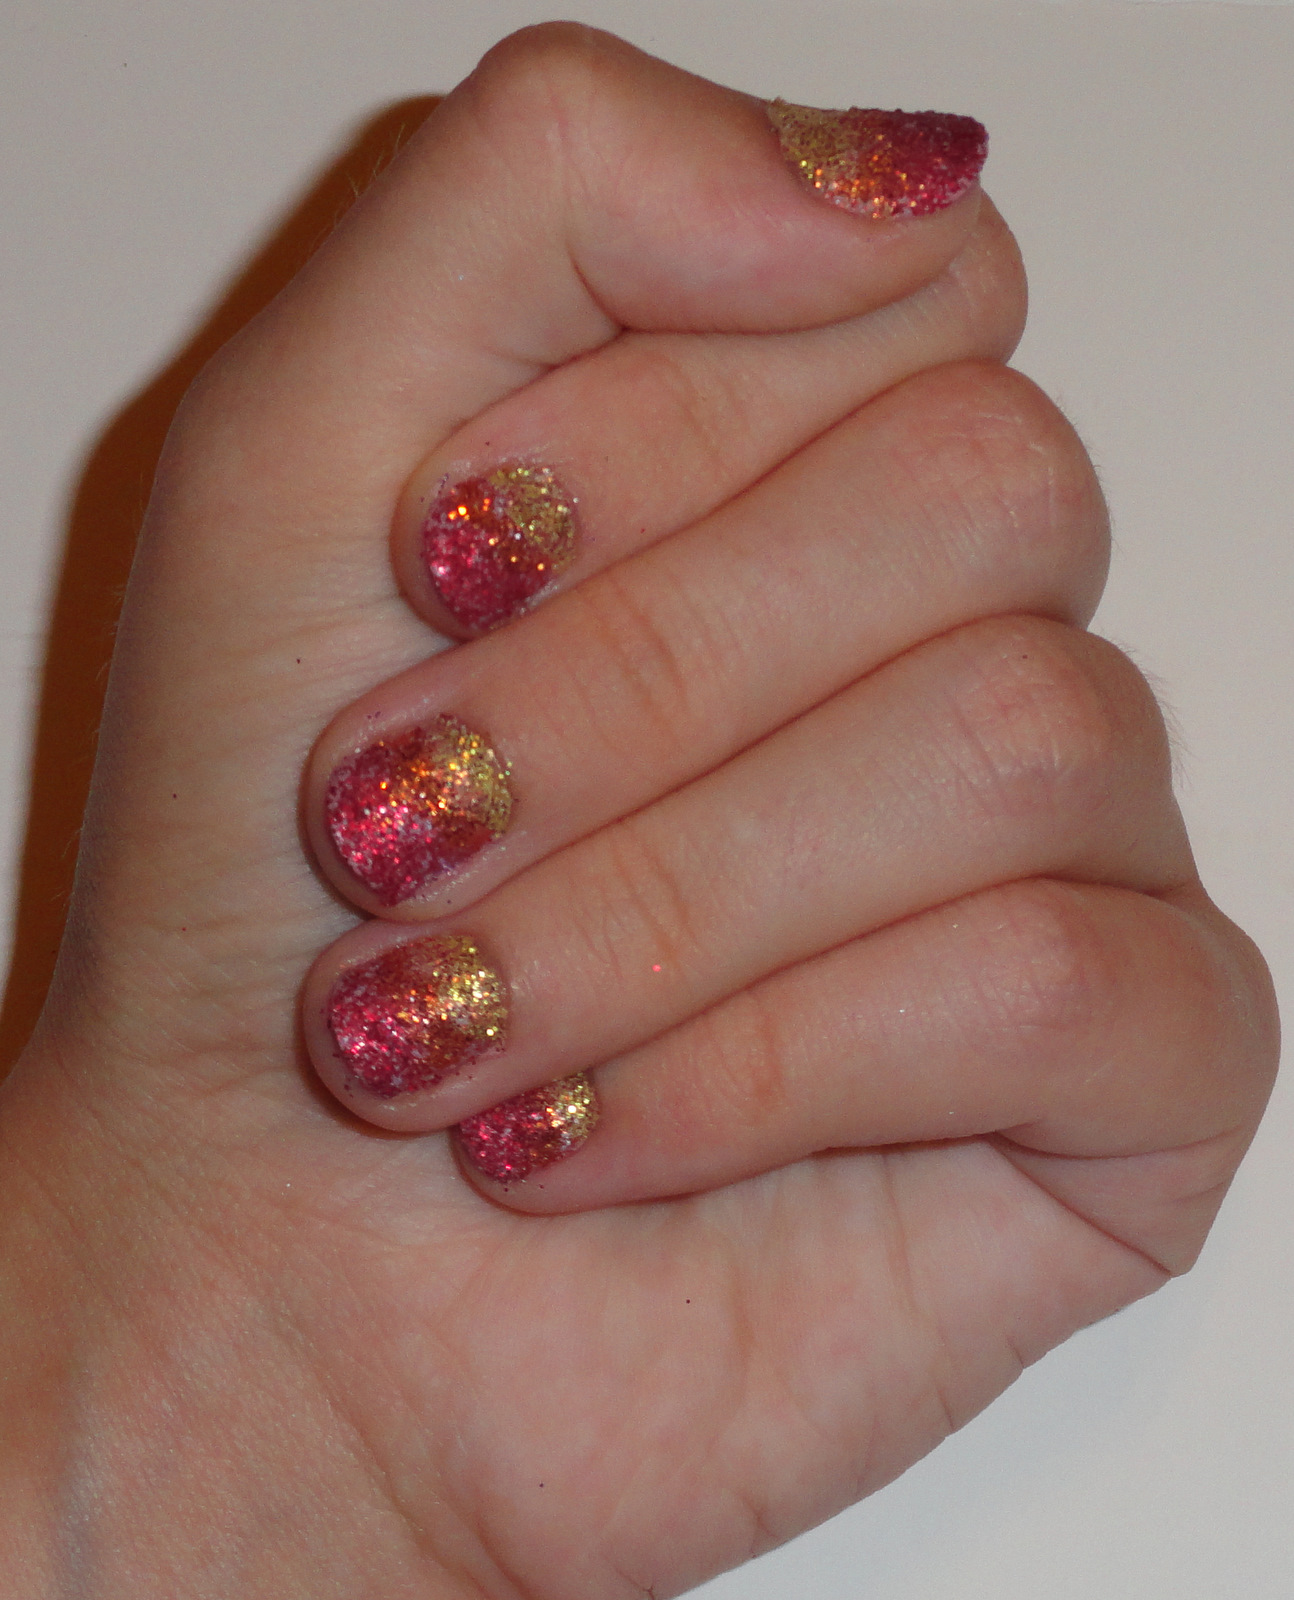
  • Second, while the second coat is still slightly sticky, dip the eyeliner brush into the darkest glitter and dab it on to the bottom of your nail bed. 
  • Third, do the same thing to apply the lighter glitter just above the darker one. 
Do the rest of that hand, then apply the top coat. 
One your nails are dry, wipe the eyeliner brush clean, the use it to sweep any excess glitter outside of your nails away.

What do you think?  Pretty easy huh?  Would you be doing this any time soon?

Here I bring you some ideas you can use to make your own.  Enjoy!


Tutorial found in:  DailyMakeOver

Wednesday, May 9, 2012

Fishtail Braids

Fishtail Braids
Girls all over the world love to adopt different types of hairstyles. Hair color, hair cuts, hair updos and braids etc are loved by all. Fishtail braid is also a very famous hairstyle. It is also known as the Herringbone or Fishbone. It drastically elaborates your looks plus it is less time-consuming too. Here is how you can do a fishtail braid/fishtail plait in just 5 minutes.

Things You’ll Need

  • Hair tie, bow, or elastic band
  • Brush or comb
  • Medium to long hair Bobby pins (optional)
Directions:
Start with a slightly damp hair. Tie your hair in a small ponytail and divide it into two sections. Pull a skinny strand of hair from the outside of the left section, and add it to the right side. Pull it tight. You have to repeat the same step to the right side. Pull a skinny strand of hair out from the outside of the right section, and add it to the left side. Pull it tight. Keep on repeating the same till your braid reaches the desired length. Tie an elastic band or hair-tie at the end to secure your fishtail braid. You have to keep in mind that the skinnier the strand you use, the more intricate the braid will look. In general, to get and even look, try to use the same thickness throughout your braid. To make sure there are no flyways, use bobby pins.


If you need some visual help, check out this video.  Have fun!!


Source:  Justin5minutes

Monday, May 7, 2012

Nail Art: Marbleized Acrylic Nails

Nail Art:  Marbleized Acrylic Nails
Apply sparkly pink acrylic as a reverse French (to allow for a clean smile line).


Place three to six wet balls of different acrylic colors on the free edge.


Use the tip of a small brush to lightly swirl around the acrylic, dragging the colors into each other. (Work quickly. You don’t want them to start setting up.)

Tuck in the sides of the acrylic, so it’s meeting edge to edge on the margins. Pat the top of the acrylic to push it into place and smooth it. (Don’t worry if there are small grooves.) Cover the entire nail with clear acrylic to fill in any grooves and make sure the free edge is secure. File, buff, and shine.
Some Variations:


Sunday, May 6, 2012

Summer Nail Trend: Border Nails

Summer Nail Trend:  Border Nails
Want to try something cool and fun for your nails this summer...?  Try Border Nails.
These great and easy technique is really cute.
Are you doing this anytime soon? Dare to try it!


Here I bring you a very cool Tutorial I found on YouTube... Try it!!

Sunday, April 29, 2012

How to do Ombré Nails?

How to do Ombré Nails? 
Start with shaped and buffed nails. 
Clean nails thoroughly with acetone polish remover. 
Do not use a base coat, as the blending for the ombré look will not work as well over a base coat. 
Work with one nail at a time so polish is wet enough to blend. 
Starting at the cuticle area, apply a blue polish in a thick layer, using a dabbing technique, about 1/3 of the way up the nail. 
Using a lighter, metallic-blue shade, immediately polish, starting where darker blue ends, and "drag" the end of the darker blue polish up the nail to the end with the lighter blue to create an ombré "fade" (so the colors look like they fade into each other). 
Continue this application with all nails. Seal nails with a quick dry-top coat.


Here is a great Tutorial.  Hope you can try it... Really Nice Technique...